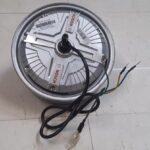
How to Upgrade Your Electric Scooter Motor Safely: A Step-by-Step Guide
Upgrading your electric scooter motor is one of the best ways to enhance your ride’s performance, speed, and power. But without the right components and know-how, it can also lead to costly mistakes.
This guide explains how to safely upgrade your EV motor, choose the right motor kit, and ensure everything works perfectly.
⚙️ Why Upgrade Your EV Motor?
Upgrading your motor can bring a noticeable performance boost. Here’s what you get:
- Better Speed – A higher wattage motor means more top speed
- More Torque – Perfect for hilly terrain and heavy loads
- Efficiency – Modern motors reduce energy loss and noise
- Customization – Tailor your scooter to your exact needs
👉 Check out premium motor kits available online.
Signs You Need a Motor Upgrade
You should consider upgrading your scooter motor if:
- Your scooter struggles on inclines
- Acceleration is sluggish even with a full battery
- You’ve already upgraded your battery or controller
- The motor makes unusual sounds or vibrations
- The battery drains faster than usual due to load
How to Choose the Right Motor
Choosing the wrong motor can damage your battery or controller. Here’s what to consider:
| Factor | What to Look For |
| Wattage | 250W–1500W (1000W+ for performance or hill riding) |
| Voltage | Must match your battery – 48V, 60V, or 72V |
| Motor Type | Hub motor (easier to install) or mid-drive |
| Brand | Trusted sellers only, like ElectricScootersParts.in |
🔗 Browse all electric scooter motors here.
Tools & Parts You’ll Need
- Compatible motor kit
- Matched controller
- Screwdrivers, spanners, multimeter
- Optional: upgraded throttle/display
- Compatible wiring harness and connectors
🛒 Shop all accessories needed for EV upgrades.
Step-by-Step Motor Upgrade Guide
- Disconnect the Battery
Always remove power first to prevent shock or damage. - Remove the Old Motor
Unscrew and detach the hub motor from the wheel or mount. - Install the New Motor
Align and mount your new motor securely. - Connect the Wiring
- Match phase wires (yellow, green, blue)
- Match hall sensor wires correctly
- Connect to the controller
- Match phase wires (yellow, green, blue)
- Secure Everything
Ensure no loose wiring or weak screws. - Test Ride
Check for abnormal sounds or overheating during a short ride.
Safety Tips During Upgrade
- Always wear gloves and use insulated tools
- Avoid shorting battery terminals
- Don’t mismatch voltage between motor, controller, and battery
- Secure axle nuts tightly
- Keep wires dry and protected
🧰 Need a new controller? Match it with your motor wattage and battery.
Aftercare & Maintenance
- Monitor temperature during first few rides
- Don’t overload your scooter beyond rated specs
- Clean connectors regularly
- Check for wire wear or damage every 2–3 months
- Keep firmware updated (for smart displays)
Common Mistakes to Avoid
- Upgrading the motor without upgrading the controller or battery
- Using mismatched voltage or connectors
- Ignoring the motor-to-frame fitment
- Leaving wires exposed to rain or mud
- Over-tightening screws on fragile plastic mounts
Conclusion: Upgrade for Performance, Not Problems
Upgrading your electric scooter motor is one of the most impactful upgrades you can make. It gives you more power, better range, and a more enjoyable ride — if done safely and properly.
💡 Pro Tip: Always buy from reliable sellers and match motor, controller, and battery specifications carefully.
🛍️ Ready to upgrade? Explore EV motors, batteries, and controllers now:


